Friday, September 14, 2018

DIY tassel garland (with dry-erase flags!)

 Hæ, it's Lexa! So, recently, I've been wanting a whiteboard, or something to easily display information and reminders on! And then I was thinking about making a garland for my bedroom door. And THEN I remembered in elementary school, writing on lamented sheets of paper with white board markers. So I realized I could make some sheets of paper, have them laminated, and I'd have a whiteboard! But having a random piece of paper on my wall, lamented, might look kind of weird. So then I had the idea to combine them, and make a garland with some dry erase flags!                                                                                                                                             So, here's what you need for this project:         *Paper to laminate and make into flags                       *tissue paper in your color of choice                                *some sort of string or yarn to use you put the tassels and flags on                                                                                                                                                                                  
So, making the flags is pretty simple. Just cut the paper into the shape you want, laminate it, and hole punch it. Then you can put it on the string or yarn you are using. It should be easy to use dry erase marker on it, and erase it!
If you don't know where to laminate it, you can also use tape on a plastic binder tab thing, usually they are dry-erase. Then you should be able to cut it up. You could also cover your paper with strips of tape, which should work the same way.


For the tassels, I found a website that explained really well (with pictures!) how to make the tassels. Here is the link to that website. After that, put them on a string and put it up where you'd like! Comment below or send us an email with any questions or comments! (Btw, the first word on this page is  in Icelandic. New addition to google translate. 🤣 In case you can't tell, I'm learning how to be friendly in many different languages!🤣 Let me know if you know how to say anything in another language!)

Saturday, July 28, 2018

Chocolate Chip Cinnamon Coffee Cake

ALOHA it's me, Annamarie! So today I will be giving the recipe on how to make the 5C, (get it?)  which is really easy!! Now, this is a family recipe and I don't know where we got it from, but it is super delicious! It is a great homemade gift!!


 mix sugar, sour cream, butter, vanilla, and eggs in a bowl

in another bowl, add baking powder, baking soda, and flour

combine bowls

put half of mix in greased pan

put half of the chocolate chips and sugar and cinnamon mix on the pan


add the remaining batter

add on the remaining chips and sugar mix

bake 30 min @ 350 degrees
TA DAAAAA YOUR DONEEEEE ITS SO GOOOOOODDDD

Sunday, July 22, 2018

Bonus Post 2018: Texting Games!

Zdravo! That's Bosnian! Anyways, today I'm going to teach you some simple games to play through texting. You don't need any special apps or anything, just some sort of texting app! (Obviously 🤣). I'll also include some descriptions, in case you have never played the games. (Or never played them through texting.) 
  1. 20 Questions. This game is pretty simple, and can be played with any number of people (for the most part). You decide on a category, such as states in the USA. One person thinks of a state, and the other people have 20 questions to guess it. Everyone guessing works as a team, (or you can say the person who guesses it correctly first wins, if there are multiple people guessing, but most people don't play this way). The questions have to be yes or no. For instance, someone could ask"does this state border the pacific ocean?" Eventually, someone may start guessing the state. For example, if the person thinking of the sate says yes to the question "does it border the pacific ocean?" and yes to the question, "does it border Canada?" you would know it was Oregon, so someone can guess Oregon. There is no restriction on questions, except it has to be yes or no, so someone could ask if it was Oregon as the first question, before they know anything else. You do not have to take turns.
  2. Connect 4.  This game is played with emoji's. You make a board of circle emoji's, and then someone starts by replacing one of the circles with a colored circle, then the next person copy and pastes that, then replaces one with their colored circle (different color) and so on. 💙💚💛💜 (You could also use something like colored hearts).  (Reminder: REMEMER HOW GRAVITY WORKS)
  3. First Last (AKA Name Game). This game is played by someone picking a category, for example, animals, and they say an animal. Then, whatever the last letter of that animal was, the other person picks and animal that starts with that letter. The game ends when someone can't think of an animal, and they lose (sometimes, if all players agree, and exception can be made if no one can think of an animal beginning with this letter. However, some people do not play this way.) For example, if someone begins with Zebra, the next person says something starting with A, like Ape. Then someone would say and an animal starting with E, like Eel, and so on. NO PLURALS. Examples of categories: Food, Animals, Fruits, Places, cities, flowers, plants, etc. 
  4. Word unscrambles. Someone thinks of a word, and scrambles it, and the other person has to unscramble it. This works best with multiple people, so whoever unscrambles it first wins, and it is their turn to think of a word next. (Could be in a category, but it doesn't have to be. If no one gets it for a while, hints may be given).
  5. Would You Rather. This game is pretty simple. You ask someone a question, such as, "Would you rather move to the hottest place on earth, or the coldest place on earth?" They give their answer, then you give yours, and then it is their turn. This game is more fun with multiple players. 
  6. And of course, Apps. There are plenty of apps out there you can download with games you can play against each other!
Have any more ideas?! Feel free to email us or comment and let us know!

Friday, June 29, 2018

Pool Games for the Summer!

Hallo!! (Dutch!!!) This is Lexa and Annamarie here! We are having a sleepover! We saw each other at the pool today, and thought, hey, we should do a post! We haven't in a while! It's currently the last day of June and its 11:04 pm right now. Here are some simple pool games for the summer, ranging from simple ones everyone knows, to some we made up! We even added some twists to some common pool games! ALL CAPS ARE ONES WE MADE UP.

  1. Playing catch with a pool ball.
  2. FLIP CATCH! It's pretty easy to do a flip underwater, so for those who can, here is a fun change to the common pool game of catch. The new game is pretty simple. You catch the ball, then do a quick flip underwater, and as soon as you come up, throw the ball to the other person. Just like in catch, count how many times in a row the ball is caught. If you wait more than 3 seconds to throw it, the streak is lost.
  3. Colors/categories! You need at least 4 people for this game. One person stands outside the pool their back facing the pool, and gives everyone  a category. Examples: colors, animals, food. Then, the people in the water are in the water by the gutter, and they think of an item in that category. When everyone has thought of their item, the person outside the pool starts guessing an item. When your item is called, you swim to the other end of the pool (or designated area). If the guesser looks back and no one is gone, they take a LARGE step forward. After someone leaves, the guesser jumps in and tries to tag them before they get to designated area. If they tag them, it is that persons turn to be the guesser. The goal is to not get tagged, if they don't tag them in time, they have to guess again.
  4. GUTTERBALL! This is easiest with less people in the pool, so you don't hit people. All you need is a ball and the side of the pool, known as the gutter. You play simply by taking turns throwing the ball into the gutter, and which ever person makes it most often wins. You can do this by using multiple balls and going from one side of the pool, or having someone on each side of the pool, and using one ball to toss back and forth into the gutters.
  5. Races! There are lot's of different swimming strokes, so it's easy to have a lot of different races!
  6. SHALLOW END RACES! For people who aren't swimmers, this is a great way to still have races. Take turns making up ways to race across the pool WITHOUT swimming! Some examples: Hopping on one foot, trying to run in the pool, and leaping.
  7. BACKGUPPY CATCH! This is a game where two people play catch, and after each catch, the people take a step back, it gets harder the farther you are. Also, it is especially hard when the pool is crowded! Try not to hit someone ;)
  8. Colors! This game is pretty simple. One person is in the water, cradling the other person like a baby. The person holding the other thinks of a color, and the person who is being carried tries to guess the color. If they guess incorrectly, then they get dunked!! If they guess correctly, then they will get back flipped into the water!
  9. Retrieving items! Drop some items, such as diving rings, t the bottom of the pool, and see who can retrieve the most!
  10. Marco Polo! One person with their eyes closed yells "marco!" The other players yell, "Polo!" While the other players try to stay away from the tagger. The tagger has to use his/her ears! It you get tagged by the tagger, then you are the next tagger. In addition to Marco Polo, the tagger can yell, "fish out of water!" Any player who is out of the water is the next tagger, but, if there is no one out of the water, the players yell, "incorrect!"
  11. Pom pom! This is best played with 5 or more people, and it works better in the deep end of the pool, so players can dive. This is where one or two players in the deep end are sharks. The other players get out of the pool and when the sharks call, "pom pom!" Then the "minos" or players out of the pool have to jump or dive in and try not to get tagged by the sharks by the time they get to the other side of the pool. If they don't get tagged, then the minos get out of the water at the other end and they are in the next round! If they do get tapped, then they become a shark! This game is played until there is one player left, who wins!! (guess who wrote this bahahah this is Annamarie sorry for grammar bad and or punctuation?)


Sunday, May 13, 2018

HAPPY BDAY CCC: Lava Cupcakes with DIY 10 Minute Ice Cream


čau! It's Lexa! By the way, that's Latvian. Anyways, so today is officially 1 year anniversary of the day we started this blog, so we decided to make a special desert together to celebrate! So, we made individual lava cakes/cupcakes. We also put ice cream on top, which took us about 10 minutes so make! (We made it while the cupcakes were in the oven.) So, here's the recipe!

Lava Cupcakes Recipe (makes 12): 

Ingredients:
  • 8 ounces semisweet chocolate chips (or any chocolate, hehe, we didn't have enough chocolate chips so there's a possibility we mixed a bunch of random chocolate...) 
  • 1 stick of butter
  • 1/2 teaspoon vanilla extract
  • 1/2 cup sugar
  • 3 tablespoons flour
  • 1/4 teaspoon salt
  • 4 eggs
  • oil or butter to coat muffin tins
  • Cocoa powder, also to coat muffin tins 
  • Ice cream (we made homemade ice cream, recipe below)
Cupcakes Directions:
  1. preheat oven to 375 degrees Fahrenheit 
  2. melt chocolate and butter in a saucepan over the stove. When melted completely, turn off heat and stir in vanilla. 
  3. combine flour, sugar, and salt in a large mixing bowl. 
  4. Sift into chocolate and mix with an electric hand mixer. 
  5. add eggs and mix in. 
  6. beat at high until batter is creamy. (About 4-5 minutes)
  7. coat each muffin tin in butter, and pour in cocoa powder lightly. Shake out excess. 
  8. Spoon mixture into the pan. 
  9. Bake for 10-12 minutes. 
  10. When the cupcakes are out, the centers should be gooey, and the outsides cake-like. Spoon on slightly melted ice cream, or make the DIY 10 minute ice cream instructions below. 

DIY 10 minute Ice cream 

Ingredients:
  • 1/2 cup half and half
  • 1 table spoon sugar
  • 1/4 teaspoon vanilla
  • 1 sandwich Ziploc bag
  • 1 gallon Ziploc bag 
  • 1/3 cup rock salt 
Directions:
  1. combine half and half, sugar, and vanilla in the sandwich bag. MAKE SURE IT IS SEALED TIGHTLY!
  2. Fill gallon bag around halfway with ice and rock salt. 
  3. Place sandwich bag in larger bag. SEAL BAG TIGHTLY!
  4. Shake bag vigorously for 10-15 minutes. (We had to take turns and use gloves. You should probably so this outside, just in case you make a mess. ) 
  5. Enjoy alone or on cupcakes! 
Enjoy your cupcakes! And happy bday CCC! 1 year anniversary!!!


To CCC lovers: go to our contact us page and scroll to the bottom of the post (not the page) and copy and paste the link ;-)

Wednesday, March 21, 2018

Happy spring!

Moi! That is Finnish! Anyways, it's Lexa, and I just mostly want to say, HAPPY SPRING! It's officially spring, as of yesterday, and though in some places it may not feel like it, since it is still snowing, it's spring nonetheless! Now you can go biking, and pick flowers, and go on walks, and do all that fun stuff outside! Also, may notice we've change our blog's background for SPRING!! Anyways, happy spring! Enjoy it! 

Saturday, March 3, 2018

DIY Candles (Thanks Caroline!)

Cześć! That's Polish! And just for the record, I have absolutely no idea how to say that. Anyways, you guessed it! Lexa here! So, recently, we came across a very interesting post about DIY candles! How cool is it that you don't have to spend, like, ten dollars on candles (or however much they cost, I don't even know) when you can just make your own! So, anyways, here is the link to our e-friend (is that a thing?) Caroline's website, with her DIY candles!!

https://www.1502candleco.com/blog/how-to-make-soy-wax-candles

Basically, you can learn how to make your own candles, as well as things like what kind of waxes to stay away from, and safety tips, which is really helpful! Anyways, just go to the link, since I haven't made one YET so I can't help you, unless I was just gonna copy and paste her whole website. Which, yeah, not gonna do. There's a word for that, I think, but I can't remember what it is. Or wait, is that the same as, like, copy and pasting something into your homework and not citing it? Ugh, it's bothering me that I can't remember that word. We, anyways, back to the DIY Candles!

Anyways, I hope y'all enjoy this, and please email us, (actually, on second thought, email Caroline. Trust her more than us, since, you know, she's the one who created that post, so she's probably a better option.) with questions, comment, or concerns. Have a great day, and enjoy you new DIY candles! Wait, let's try that in polish. Mają wielki dzień, i cieszyć się nowe świece DIY! Yay, I did it! Anyways, I'll stop now. Bye!

The Best Chocolate Brownies EVER!!!

Salve! That's Latin!! Anyways, it's Lexa here! So, I don't know who made this recipe, but it was found on vitacost.com. So, let's give the creator of this recipe a round of applause, people! Now, time to teach you how to make the best thing since sliced bread! (Well, ok, to be honest, sliced bread may be better. But only barely!!) Ok, and just a fair warning, they do crumble a little, but their AMAZINGNESS totally makes that worth it.

Ingredients:
  • 2 Tbsp. organic cocoa powder
  • 2 Tbsp. almond meal
  • 2/3 cup oat flour
  • ¼ tsp. organic baking soda
  • ¾ cup organic cane sugar
  • ¼ tsp. sea salt
  • 2 tsp. vanilla extract
  • 2 large eggs
  • 6 Tbsp. organic unsalted butter
  • 6 oz.dark or bittersweet chocolate (or 1 cup chocolate chips)
  • Optional: Nuts, coconut shreds, chocolate chips

Directions: 
  1. Preheat oven to 350 degrees F. Use butter to grease 8×8 baking pan.
  2. In a mixing bowl, combine cocoa powder, oat flour, almond meal, baking soda and sea salt; whisk together and set aside.
  3. In a double boiler (or bowl propped over a pot of simmering water), melt butter and chocolate, stirring until smooth.
  4. Remove butter/chocolate from heat and stir in sugar, mixing for 30 seconds. Stir in eggs for 20 seconds, then add vanilla.
  5. Combine dry and wet ingredients and stir to combine. Stir in add-ins, if using, then pour batter into baking pan, smoothing top with spatula.
  6. Bake brownies for 33 to 38 minutes. (Note: Edges will rise higher than center. Use toothpick inserted in center to test for doneness.)
  7. Let brownies cool completely before cutting and serving.

Also, sorry I don't have a picture. We ate it all. 😝😝😝😝 

Sunday, February 11, 2018

Flourless Strawberry Brownies

Ciao! That's Italian, I think! It's Lexa! Today I am going to show give you a strawberry brownie recipe, from Amanda @ Running With Spoons! (If you want another recipe I've tried from her, click here for the link!)

Ingredients:

  • one medium sized ripe banana
  • 1/s cup of almond butter 
  • 3/4 cup strawberry jam
  • 1 large egg
  • 2 tsp vanilla extract
  • 1/4 cup unsweetened cocoa powder
  • 1/2 tsp baking soda 
  • Optional: 3 tbsp. small chocolate chips to mix in the batter!! (Well, you can use normal sized ones too, but smaller ones are more fun!)
Directions:
  1. Preheat oven to 35o degreed Fahrenheit. Spray a 8 x 8 (that's what the recipe said, but I used a 9 x 9, since our 8 x 8 pan blew up... TRUE STORY!)
  2. Add mashed up banana to a mixing bowl, along with almond butter, jam, egg, and vanilla. Mix until well combined
  3. When combined, add baking soda and cocoa powder, and chocolate chips (optional) and mix gently until the batter is smooth. 
  4. Pour the batter into your pan, and distribute evenly
  5. Bake for 35-40 minutes. 
  6. Let cool for about 15 minutes before transferring to wire rack to cool completely
  7. Optional: Melt 2-4 tbsp. of chocolate chips and pour over the brownies. 
  8. You can store these in an airtight container for up to 5 days. 
Hope you enjoyed making these and eating them! Want to make some more delicious chocolate deserts? Click here for some amazing chocolate s'mores cupcakes! (Fun fact: We made this recipe together on the day we first created the blog! Another fun fact: we may or may not have dropped an egg that day...) 

Wednesday, February 7, 2018

Healthy Chocolate Glazed Donuts

Bonjour! That's French, as most of you probably know. It's Lexa here! Keep scrolling down for a simple, healthy chocolate donut recipe!


Total time: 20 minutes

Ingredients:
  • 1 cup whole wheat flour
  • 1/4 cup unsweetened cocoa powder
  • 1/4 cup granulated sugar
  • 1/2 tsp. baking powder
  • 1 egg
  • 1/2 tsp baking soda
  • 1/4 cup unsweetened milk
  • 1/4 cup plain/vanilla yogurt
  • 2 tbsp. coconut oil or butter, melted
  • 1/2 tsp vanilla extract
  • 2 tbsp. melted chocolate chips.
Directions:
  1. preheat oven to 375 degreed Fahrenheit
  2. Lightly grease a donut pan
  3. In a large mixing bowl, combine cocoa powder, sugar, flour, baking soda, and baking powder
  4. In a separate bowl, whisk the egg, milk, yogurt, butter, chocolate, and vanilla extract.
  5. Add to flour mixture
  6. Stir gently until combined
  7. pour into pan and bake for 8-10 minutes
Glaze Ingredients:
  • 3/4 cup powdered sugar
  • 2 tbsp. unsweetened milk
  • 1 tbsp. vanilla extract
Glaze Directions:
  • Combine ingredients and stir until smooth
  • Place wire rack over a piece of parchment and spoon the glaze onto each donut after they are out of the oven, or dip the donuts in it
  • Repeat with all donuts
  • Enjoy!
Hope you enjoy these simple donutsHave fun making them, and be sure to keep checking back for more recipes and crafts! Also, thanks to Amanda @ Running With Spoons for this recipe!

Sunday, January 14, 2018

Bonus Post 2018: Yearly Pic

Ciao! It's Lexa!! So, Annamarie and I started doing this two years ago. Basically, you and your bff take a picture every year around the same day, in the same place. (Have someone take it for you.) Then, the next year, do it again. Each year, take something that represents what you like doing together that year, (Ex, dolls, legos, baking, drawing, etc.) and make sure that is in the picture! Then, compare them each year, and remember the phases you went through together, or laugh at how young you look!

Friday, January 12, 2018

Bonus Post: 2018: Focus and Concentration Tips

Hello it's Annamarie and uhhh... hold on... (chews gum) OH YEAH WE ARE GONNA HELP YOU FOCUS TODAY!!

So, if you're like me and cannot focus when doing homework or studying, then these tips and tricks I use for my slightly-ADH....uhh whats the last letter? (spins fidget spinner)-D!!

If you guys have minor issues with concentrating, then step right up and keep on reading! Here is a list of things I have in my life that make homework and studying so much easier, faster, and I improve greatly in school!

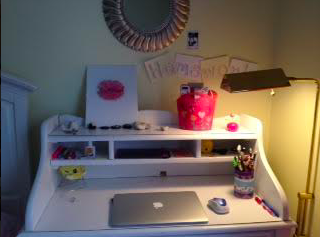
So this is my first year of exams and finals, so it is definitely stressful! First, you want to start up with a simple area of a light room, such as in your room, near a window, or in a sunroom! Then, place a DESK in that area. I like a white desk, with not to many drawers, for total focus. I have mine in my room on the top floor of my house, so I do not get distracted with sounds.

(Hey, Lexa here. Just checking what Annamarie posted, since she told me to. I also have a white desk! Anyways, I put a lot of pictures on mine, and a lava lamp. This is so, when I need a 30 second break from writing an essay or something, I can stare at it for a while. It's really cool to watch!)

The next step once you found a simple hard desktop is DECORATE IT! Now, I don't mean toooo much. I went for a very minimalist look, with the basic necessaries of school! I found a cup holder and put pens and pencils in it, have a spot for white out, an eraser, and sticky notes, another spot for a to-do list, the last spot for my study items! On top I have some quartz rocks, painted rocks, a sewing project I did, bookmarks, and a flower that sways in light! (Seen below)

So now its time for school. Grab a computer, a pencil, your papers, and your phone. Thats right, unless you have major 24/7 I-need-to-be-on-my-phone-at-this-very-second issues, then put your phone right next to you, face down. Turn off the ringer, too. Or, like Lexa does, put your phone about 10 feet away from you, so you have to exercise and walk to check it! Seen below is the best pencil ever!

Next, grab some earbuds and play music! I would suggest calm, relaxing, focus music that you can find on youtube, or any other music that you think would help YOU.
The best studying music ever ->https://www.youtube.com/watch?v=WPni755-Krg<-


Before you start studying, create a to-do list saying what you want to accomplish that day. Check off the items as you have completed them!


(Lexa here again! I have a magnetic to do list, since part of my desk has a magnetic whiteboard, and what I like to do is color code what I need to do!! ...but, I like lots of color on everything, so...)

GOGOGO!! Do your work! From the to-do list, see which ones you need to get done ASAP, and save off ones in case you don't have time for them. Study for 30 minutes, then every 5 minutes, take a break. This includes CHECKING YOUR PHONE, and drinking water. Btw, I would suggest if you are hungry to have fruit! Set a timer for 5 minutes and then get right back to work!

If you absolutely cannot concentrate, I suggest a few good tips:
-turn on airplane mode
-stretch
-get motivated
-ask friends for support

(Lexa here. I have some good tips for motivation. I made a DIY Dream Jar that I keep on my desk, so when I don't feel motivated, I simply look at that and remember my goals!! I have a lot of academic goals in it, so it helps me to look at it and remember those! Another things you can do it put a motivational poster or sticky note near your workspace to look at!)

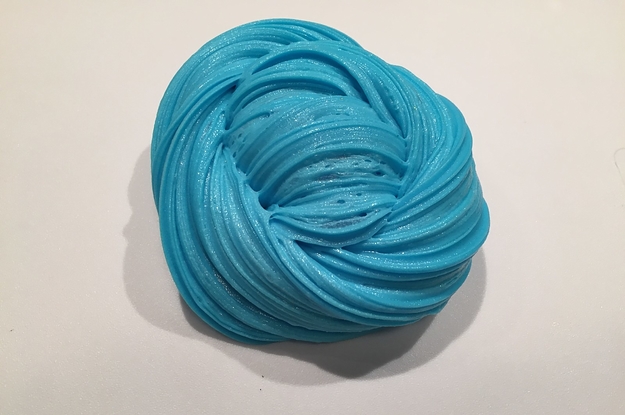
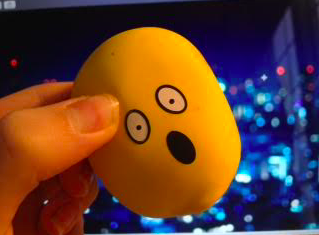
Also, a few bonus things to add to your desk to fidget with! Some of these include (and these DO HELP):

Stress ball, which lets my hands have a break from writing.

Indented heart, I rub my thumb on the indented thumb print, it is soothing.

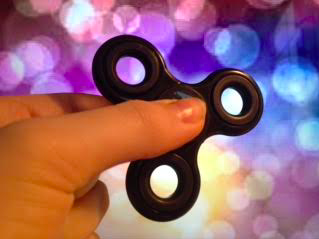
Fidget spinner, fun toy to take a break with, also helps memory think of things faster.

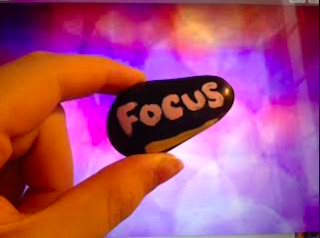
Focus rock, reminds you to focus, even when its hard.

Gum, proven to help speed up mind and remember things.


EXTRA RANDOM TIPS:
Use a partner when studying foreign languages
Highlight lines of text for speeches
Be creative
Use GALE for social studies research
Doodle!

~I hoped you guys really enjoyed that! Right now its Friday and I don't have school and its 1:27 pm and I'm still in my pjs but I have no homework so yay!

(Lexa here. Me too, Annamarie!! 😀😀)

This took a lot of time to write and take the pictures (with and iPhone 4!!! *cough cough COUGH!*) Thank you for reading this and I challenge YOU to send this blog to TWO of your friends that definitely need this! (sending to Lexa ASAP lol) I hope you guys enjoyed this and I'm gonna get ready to tackle my day (yes I'm a wrestler) ((or not)) Sorry BYEEEEEYEYEYEYYEYEYEE!!!!!!!!!!!!!!!!!!!


If you see this, you're AWESOME!!!! and a true ccc fan!!!!!!!!!!!!!!!!!!! 💖💕💓❤♡

DIY Slime Without Using Borax

Related image


DIY Slime Without Using Borax

Heyyyy its Annamarie here, so who doesn't love slime??!?!??! I made this easy teal slime without borax! You can mold it into whatever shape you want and it is super stretchy and doesn't break! If you want to know how to make it, read below!! 
  1. put 1/2 cup of shampoo and 1/4 cup cornstarch in a bowl
  2. mix
  3. add 3-5 drops of food coloring, or glitter;) (100% optional)
  4. add 1 tablespoon of water 
  5. stir
  6. add 5 tablespoons of water, stir after each one
  7. knead the slime for around 3-5 minutes
ENJOY!!!!!!! ;)

Wednesday, January 3, 2018

French Lemon Cake


Hey! Lexa here! So I thought, with the cold weather and snow where we live, that making some citrus food would make it feel more tropical and summer-y:). So, here is a simple, French Lemon cake! (The frosting was pretty sour, at first, so you can use less lemon juice if you want).

Ingredients:
  • Zest (peel) from 1 lemon, finely grated
  • 1/2 cup of butter
  • 1/2 cup sugar
  • 2 eggs
  • 1/2 cup and 3 oz all purpose flour
  • 1 tsp baking powder
  • 1 1/2 cup powdered sugar
  • juice from 1 lemon
  • bread loaf pan
Instructions:
  1. Preheat oven to 325 degrees Fahrenheit.  
  2. spray cake pan with cooking spray
  3. Beat grated lemon zest, sugar, and butter until smooth. Then add eggs and beat for 30 seconds. 
  4. Scrape the sides of the bowl. 
  5. In a separate bowl, mix flour and baking powder, just until flour disappears. [otherwise, cake will be dry. So, mix more if you like very dry cake!! (Don't, though.)]
  6. Add to main bowl. 
  7. Pour batter into pan. 
  8. Bake for 50-55 minutes. 
  9. Now, mix powdered sugar and the juice from one lemon together. 
  10. When the cake is out of the oven, pour this glaze over the cake. Then let cake cool and enjoy!
Note: This recipe is not made up by me, but I got this recipe from my French class, and do not know where it came from. (Also, We changed the recipe slightly.) So... here is a citation to the website this came from, even though I don't know where that is. Pretend it is here. Enjoy the cake!

Tuesday, January 2, 2018

Yarn Wrapped Cup Holders

Image result for yarn around cup holders
Hellloooooo it is Annamarie here!!

So, here is some simple instruction on how to make these super simple and easy arm cup holders that can store anything from bookmarks to pencils! This cozy feel to the chilly winter where we live adds a warmness in the air!

I cannot give all the credit to myself, but I have gotten most of the information from a website linked right here: http://yarnobsession.blogspot.com/2013/01/recycled-crayon-cozy-cup-holders-pattern.html go check it out! Also, photo creds to My CRAZY Yarn Obsession!

Directions:
Simply grab a tin can or cup and take any type of yarn and either wrap it around the cup or knit a pattern and then tie it around!!!
Either way, this craft is super simple and a great gift for anyone!

End of The Year Update ➣2017⇠

Everything is from this year (2017) unless otherwise mentioned.

Funniest memory (together):

Lexa: Annamarie ate paper 3 times, and swallowed it twice. I quote "It's not that bad... WAIT look up is it healthy to eat paper,  Lexa!"
Annamarie: Lexa DROPPING HER WATER BOTTLE EVERYDAY and Lexa FALLING ALOT! also talking about a girl, trying not to get yelled at for laughing so hard (but has happened!)


Something funny that happened when we were laughing together:
Lexa: Annamarie spitting out apples
Annamarie: true I can't argue with Lexa, but another one came you-know-where😝


Longest time spent together (all time):
3 days (Friday night, Saturday, Saturday Night, Sunday morning)


How we met:
In 2013, long story short, a bean plant

Funniest memory from a sleepover:
Lexa: 1) Annamarie was afraid of the space in between my bed and the wall, and then in the middle of the night she fell in it 2) She tried to see how many apples she could shove in her mouth, and I video taped it, and then she spit them out and we couldn't stop laughing  3) Annamarie ate paper
Annamarie: 1) "I'm going to die because my iPods at 20%!" - quote by Lexa. 2) Eating my doll's arm off 3) making forts with Lexa and then they fall down all the time 4) 'bad luck' hand 😂(also happens in school)


DIY Cupcakes Challenge

Hey! It's Lexa! So, we did this challenge with our friend Silvia! This challenge makes you feel like you are on a baking show! Anyways, here is the challenge..

1. Make a vanilla cupcake batter, without vanilla extract. Then, take out a bunch of ingredients from the pantry and fridge. We took out the ingredients in the picture above, but we didn't use them all.
For example:
  • Vanilla extract
  • peppermint extract
  • chocolate syrup
  • spices
  • chocolate chips
  • sprinkles
  • anything you find that may be good in cupcakes!
2. Now, split the batter up evenly, in separate bowls.
3. Now, the fun part. Chose some things to use in your cupcakes to make it your own! (We didn't measure them, so we don't know how much we used.)
4. Then place them in cupcake tins, and don't mix the different batters together! When you are done baking them, have a judge determine the best one. Don't tell them whose is whose!!
5. {Don't forget to give your cupcake recipes a name! You can look at our cupcake descriptions below to see our cupcake names, for some inspiration!  [Silvia and Lexa (me!) had a hard time coming up with names for ours!]}

Rules:
  • DO NOT copy each other. Obviously. 
  • NO ELECTRONICS. No looking up recipes. YOU have to decide how much of what to put in!
  • ONLY use what is put out. If you have an idea and something you need is not in the ingredients, ask the other teammates if you can get it out. 
  • Be creative. Don't make boring vanilla cupcakes. 
Now... drumroll please... here is what we made!!


The first one was made by Silvia. Called: Caramel Surprise. She made it with coco powder, Nutella, vanilla extract, chocolate syrup, chocolate chips (Which you can't see) Caramel on top, and some peppermint extract.
The second one is Lexa's (mine). It is called...Holiday Spice. She used gingerbread spice, cinnamon, ginger, sprinkles, and chocolate chips.
The last one is Annamarie's. It is called Coco Twist.  She used peppermint extract, chocolate chips, crushed up candy canes, and coco powder. 

And the winner was... LEXA!! Yay!! Hope you enjoy this fun challenge that made us feel like we were really on a tv cooking show!